A common thing I do at work is upgrading MongoDB Replica Sets.
The more do it, the more I think of the time I spend doing it.
So I built a lab test that tries to answer:
How long does it take to upgrade a MongoDB Replica Set using Apache Airflow?
Check the scripts here:
https://github.com/ad132p/labs/tree/main/dags
Please keep in mind we have the following software requirements for this test:
PREREQUISITE #1: 3 Debian 13 or Rocky Linux 9 Virtual Machines.
In all of my tests, I use my own repo for setting up a libvirt/KVM based deployment of 3 VMs:
https://github.com/ad132p/labs
In case you know libvirt/KVM, go take a look!
You need terraform (or opentofu) for deploying the nodes.
tofu plan
tofu apply
Keep in mind this test also requires Airflow SSH Operator, therefore we need key-based SSH connectivity to the all 3 VMs.
PREREQUISITE #2: A P-S-S MongoDB v7.0 replica set
We need a standard MongoDB replica with 3 nodes: One primary, and 2 secondaries.
There are many ways to deploy a MongoDB replica set, but this deployment
uses PSMDB from Percona. It is a drop-in replacement of MongoDB community version,
plus it has nice add-on features.
Check it out!
https://docs.percona.com/percona-server-for-mongodb/7.0/install/index.html
I could set up the replica set manually, but for better troubleshooting,
I opted to use mongo_terraform_ansible since it deploys Replica Sets and Sharded environments on RHEL and Debian compatible machines.
As long as you have a healthy MongoDB Replica set running on version 7, we should be safe to proceed.
mongo_release: psmdb-70
rs0 [primary] test> db.version()
7.0.26-14
rs0 [primary] test>
Warning: From now on, I assume you have access to a mongosh shell similar to this:
[apollo@grow ~]$ mongosh 'mongodb://root:password@db-1:27017,db-2:27017,db-3:27017/?replicaSet=rs0'
Current Mongosh Log ID: 693ca63329e00f9aa9722621
Connecting to:          mongodb://<credentials>@db-1:27017,db-2:27017,db-3:27017/?replicaSet=rs0&appName=mongosh+2.5.9
Using MongoDB:          7.0.26-14
Using Mongosh:          2.5.9
mongosh 2.5.10 is available for download: https://www.mongodb.com/try/download/shell
PREREQUISITE #3: Apache Airflow
For now just install Apache Airflow
Let's go with default pip for this test:
export AIRFLOW_HOME=~/airflow

# Rocky Linux 9

# You have to install uv as instructed by apache airflow:
# https://docs.astral.sh/uv/getting-started/installation/

# Once you have uv, create your python 3.10 env:

uv python install 3.10.7

uv venv
source .venv/bin/activate

AIRFLOW_VERSION=3.1.3

### Extract the version of Python you have installed. If you're currently using a Python version that is not supported by Airflow, you may want to set this manually.
### See above for supported versions.
PYTHON_VERSION="$(python -c 'import sys; print(f"{sys.version_info.major}.{sys.version_info.minor}")')"

CONSTRAINT_URL="https://raw.githubusercontent.com/apache/airflow/constraints-${AIRFLOW_VERSION}/constraints-${PYTHON_VERSION}.txt"
### For example this would install 3.0.0 with python 3.10: https://raw.githubusercontent.com/apache/airflow/constraints-3.1.4/constraints-3.10.txt

uv pip install "apache-airflow==${AIRFLOW_VERSION}" --constraint "${CONSTRAINT_URL}"
Finally start airflow:
airflow standalone
Access airflow by accessing http://localhost:8080/
Username is admin and password should be here:
cat ~/airflow/simple_auth_manager_passwords.json.generated
Now open another terminal session using the same directory you installed your venv environment, and do the following:
Activate venv:
source .venv/bin/activate
Install SSH provider:
uv pip install apache-airflow-providers-ssh --python /home/apollo/.venv/bin/python
Run this test command:
airflow tasks test example_bash_operator runme_0 2015-01-01
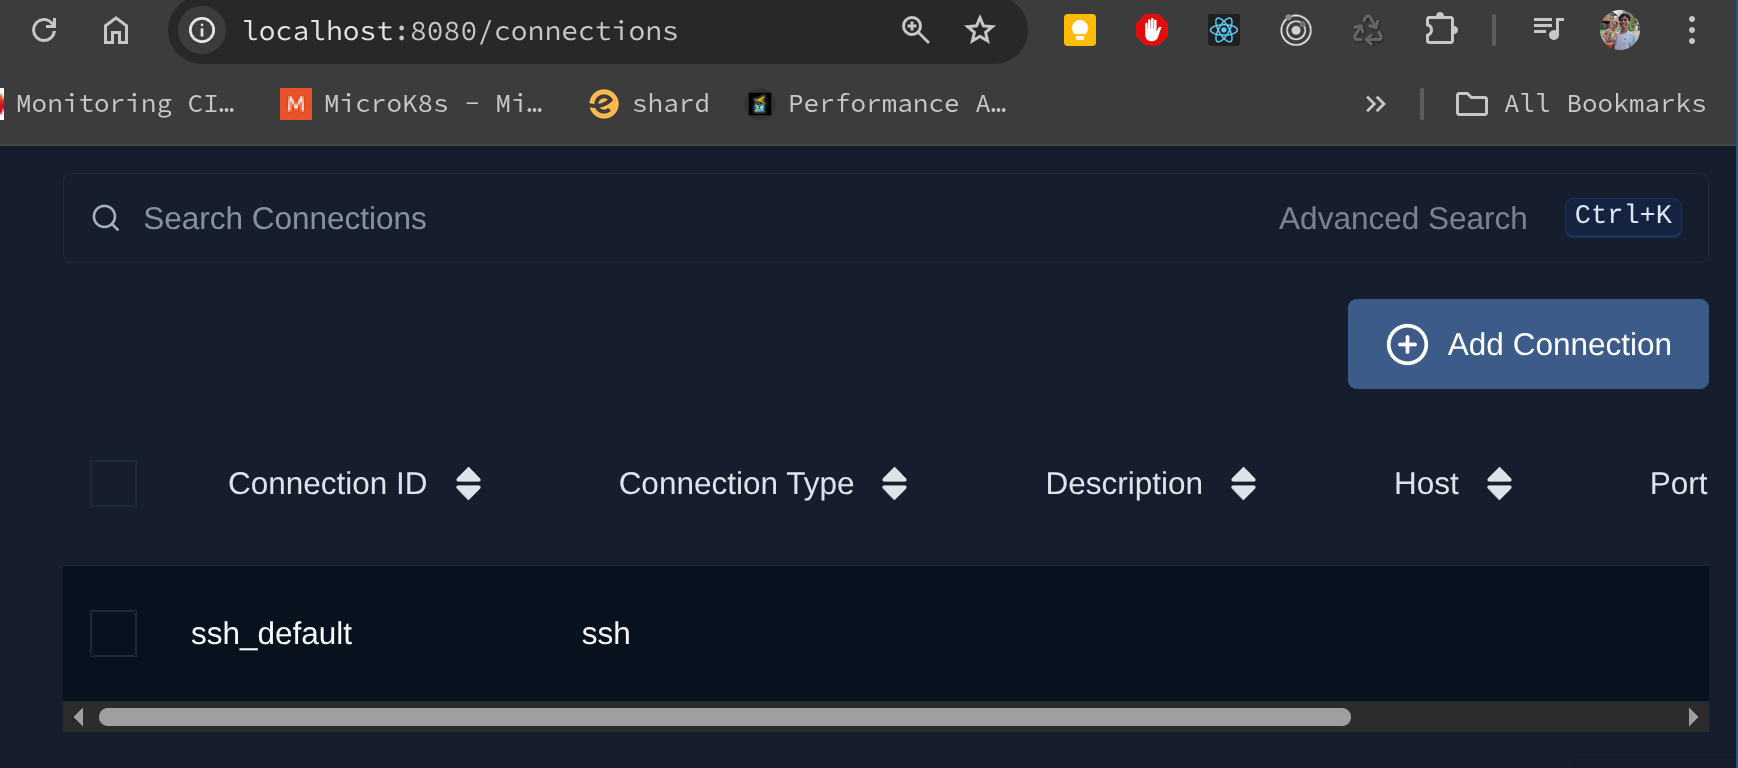
Lastly, make sure you have an SSH Connection set up.
In my case, I have one SSH Connection object named ssh_default:
Please make sure your connection uses an SSH Key to connect to the VMs
{
  "key_file": "/path/to/your/private_key_file"
}
Several MongoDB maintenance tasks require rolling releases in a Replica Set — in our example, we must upgrade MongoDB packages one node at a time to maintain high-availability. This typically means upgrades complete on secondary nodes first, and require the primary node to step down later on. After an election occurs, the former-primary, now-secondary node can also be finally upgraded. This high-level plan exemplifies this process:
0. Replica Set Service Discovery (who are secondaries and who is primary?)
1. Shut down any secondary replica set member and upgrade MongoDB packages, one node at a time
2. Step down the replica set primary.
3. Upgrade the former primary (Step #1 again)
4. set Feature Compatibility Version to "8.0" after customer approval.
In any maintenance task, we typically have a detailed list of steps containing shell script commands that change database and operating system state.
Before engineers start working on the next node, they perform many checks for errors in the logs, replica set status and replication lag. After checks are validated, engineers continue work on remaining nodes.
Since Airflow’s DAG (Directed Acyclic Graph) structure allows you to define strict sequences of tasks (nodes), and exceptions (vertices), it looks like a promising tool for defining workflows for distributed environments.
In this lab test, all steps we take are defined as nodes, and dependencies
are enforced by exceptions (arrows). Based on our previous high level plan, we may define detailed steps:
We need to make sure that the Replica Set is healthy to begin with.
There are many ways to do this, but for now we can check if there is any delay in any secondary node.
rs0 [primary] test> rs.printSecondaryReplicationInfo()
source: db-2:27017
{
  syncedTo: 'Sat Dec 20 2025 00:10:34 GMT+0000 (Coordinated Universal Time)',
  replLag: '0 secs (0 hrs) behind the primary '
}
---
source: db-3:27017
{
  syncedTo: 'Sat Dec 20 2025 00:10:34 GMT+0000 (Coordinated Universal Time)',
  replLag: '0 secs (0 hrs) behind the primary '
}
We can also use commands such as rs.status() to check individual node information. This is very helpful since replica set secondary nodes and primary node are identified, and this distinction affects the ordering of our tasks. Keep in mind we always begin work on secondary nodes. More often than not, we begin work on backup dedicated secondaries, often with 0 votes and 0 priority.
In this step we may have extra checks, such as checking if a backup process is happening, or an index is being created. For simplicity these will be omitted here. The key is to know what are the service discovery process is necessary for you to validate whether your main task is able to be executed based on your database state.
After all service discovery checks are completed, we are ready to proceed with remaining steps.
Using Airflow, this is how we may define our service discovery checks:
    @task(multiple_outputs=True)
    def service_discovery(**context):
        """
        Connects to the MongoDB Replica Set and identifies the Primary and Secondaries.
        Performs health checks:
        1. Ensures all nodes are in healthy state (PRIMARY, SECONDARY, ARBITER).
        2. Ensures no Secondary is lagging behind more than 10 seconds.
        Returns a dict with 'primary' and 'secondaries' lists.
        """
        # Configuration - In a real scenario, fetch these from Variables or Connections
        mongo_uri = context['params'].get('mongo_uri','mongodb://root:percona@db-1:27017,db-2:27017,db-3:27017/?replicaSet=rs0')

        client = pymongo.MongoClient(mongo_uri)
        status = client.admin.command('replSetGetStatus')

        members = status['members']
        primary = None
        secondaries = []

        # Find Primary first to get reference optime
        primary_optime = None
        for member in members:
            if member['stateStr'] == 'PRIMARY':
                primary_optime = member['optimeDate']
                break

        if not primary_optime:
             raise Exception("No Primary found in Replica Set! Cluster may be unhealthy.")

        for member in members:
            name = member['name']
            state = member['stateStr']
            host = name.split(':')[0] # Assuming name is host:port

            # Health Check: Validate State
            if state not in ['PRIMARY', 'SECONDARY', 'ARBITER']:
                raise Exception(f"Node {name} is in unhealthy state: {state}")

            # Replication Lag Check for Secondaries
            if state == 'SECONDARY':
                secondary_optime = member['optimeDate']
                lag = (primary_optime - secondary_optime).total_seconds()

                if lag > 10:
                    raise Exception(f"Secondary {name} is lagging behind by {lag} seconds (Threshold: 10s).")

                secondaries.append(host)

            elif state == 'PRIMARY':
                primary = host

        if not primary:
            raise Exception("No Primary found in Replica Set (Logic Error)!")

        print(f"Service Discovery passed. Primary: {primary}, Secondaries: {secondaries}")

        return {
            'primary': primary,
            'secondaries': secondaries,
            'all_members': [primary] + secondaries
        }

    discovery = service_discovery()
Once you declare discovery variable with the output of service_discovery function call, we can build a simple helper task to return only secondary nodes:
    @task
    def get_secondary_hosts(discovery_result):
        return discovery_result['secondaries']

    secondary_hosts = get_secondary_hosts(discovery)
The upgrade task receives a list of secondary nodes under discovery_result parameter, and uses
pymongo module for accessing mongodb clusters, and Airflow SSH Provider for acessing VMs and running upgrade commands as root linux user.
These commands need to be predefined and in this example I try to support apt and yum package managers only.
A professional environment should support customer's exact Linux distributions and version.
The commands below identify if the VM runs on Debian or Rocky Linux, stop mongodb, upgrade PSMDB/MongoDB packages, and bring mongodb back up.
   # Define the upgrade command sequence
    # Note: Non-interactive frontend for apt to avoid prompts
    upgrade_commands = """
    echo "Starting Upgrade on $(hostname)..."

    # OS Detection
    if [ -f /etc/os-release ]; then
        . /etc/os-release
        OS=$ID
    else
        echo "Cannot detect OS, assuming Debian-based..."
        OS=debian
    fi

    echo "Detected OS: $OS"

    echo "Stopping MongoDB..."
    # Universal service stop (systemd)
    if command -v systemctl &> /dev/null; then
        sudo systemctl stop mongod
    else
        sudo service mongod stop
    fi

    if [[ "$OS" == "debian" || "$OS" == "ubuntu" ]]; then
        echo "Running Debian/Ubuntu upgrade path..."
        export DEBIAN_FRONTEND=noninteractive

        echo "Updating Repositories..."
        sudo percona-release enable psmdb-80 release
        sudo apt-get update

        echo "Installing Percona Server for MongoDB 8.0..."
        sudo apt-get install -y percona-server-mongodb

    elif [[ "$OS" == "rhel" || "$OS" == "rocky" || "$OS" == "centos" || "$OS" == "almalinux" ]]; then
        echo "Running RHEL/Rocky upgrade path..."

        echo "Installing Percona Server for MongoDB 8.0..."
        # Simply install/update the package. DNF handles dependencies.
        # Ensure the repo is enabled beforehand or enable specific module if needed.
        sudo percona-release enable psmdb-80 release
        sudo dnf install -y percona-server-mongodb

    else
        echo "Unsupported OS: $OS"
        exit 1
    fi

    echo "Starting MongoDB..."
    if command -v systemctl &> /dev/null; then
        sudo systemctl start mongod
    else
        sudo service mongod start
    fi

    echo "Waiting for health check..."
    # Simple check loop
    for i in {1..30}; do
        if nc -z localhost 27017; then
            echo "MongoDB is up!"
            exit 0
        fi
        sleep 2
    done
    echo "MongoDB failed to start!"
    exit 1
    """
The script does not succeed if upgraded secondary is not able to rejoin SECONDARY state after 30 retries. Retry intervals take 2 seconds each.
The upgrade_commands variable is used right after:
A task named upgrade_secondaries_sequentially receives a list of secondary nodes as parameter, tries to access them sequentially using SSH Operator hook, and runs commands listed in upgrade_commands.
At the end of the iteration, a while loop waits until the upgraded node comes back up with status SECONDARY.
If script execution is unable to run replSetGetStatus command, the python script raises a general 'execution failed' exception.
    @task
    def upgrade_secondaries_sequentially(discovery_result, **context):
        from airflow.providers.ssh.hooks.ssh import SSHHook

        secondaries = discovery_result['secondaries']
        mongo_uri = context['params'].get('mongo_uri', 'mongodb://root:percona@db-1:27017,db-2:27017,db-3:27017/?replicaSet=rs0')
        client = pymongo.MongoClient(mongo_uri)

        for host in secondaries:
            print(f"Starting upgrade for secondary: {host}")

            # Execute Upgrade Command via SSH
            # We assume the SSH connection ID matches the host or is passed in a predictable way
            # For this example, we'll try to use 'ssh_default' but ideally it should be dynamic
            # In a real world scenario, you might have specific conn_ids per host or use the hostname in the conn

            try:
                # Using a generic hook for demonstration, assuming it can connect to 'host'
                # If using distinct connection IDs per host:
                # ssh_hook = SSHHook(ssh_conn_id=f"ssh_{host}")
                # If using one key for all:
                ssh_hook = SSHHook(ssh_conn_id='ssh_default', remote_host=host)

                # Execute command ONLY ONCE
                stdin, stdout, stderr = ssh_hook.get_conn().exec_command(upgrade_commands, timeout=600)

                # Wait for command to complete and get exit status
                exit_status = stdout.channel.recv_exit_status()

                print(f"Upgrade output for {host}:")
                out_str = stdout.read().decode()
                err_str = stderr.read().decode()
                print(out_str)

                if err_str:
                    print(f"STDERR for {host}:")
                    print(err_str)

                if exit_status != 0:
                    raise Exception(f"Upgrade failed on {host} with status {exit_status}")

            except Exception as e:
                raise Exception(f"SSH Execution failed for {host}: {e}")

            # Health Check: Wait for node to return to SECONDARY state
            print(f"Waiting for {host} to rejoin as SECONDARY...")
            max_retries = 30
            retry = 0
            while retry < max_retries:
                try:
                    status = client.admin.command('replSetGetStatus')
                    member_status = next((m for m in status['members'] if m['name'].startswith(host)), None)

                    if member_status:
                        state_str = member_status['stateStr']
                        print(f"Current state of {host}: {state_str}")
                        if state_str == 'SECONDARY':
                            print(f"{host} is healthy and caught up.")
                            break
                    else:
                        print(f"Member {host} not found in status yet...")

                except Exception as e:
                    print(f"Error checking status: {e}")

                time.sleep(10)
                retry += 1

            if retry >= max_retries:
                raise Exception(f"Timeout waiting for {host} to become SECONDARY")

    upgrade_secondaries = upgrade_secondaries_sequentially(discovery)
After the upgrade tasks on all secondary nodes are complete we demote the primary node, so it becomes a secondary.
The script uses pymongo to run a replSetStepDown admin command in the primary. This example considers that connections drops are expected, therefore it handles socket/net exceptions gracefully. After stepDown, we run replSetGetStatus to fetch current replica set state, and check if a new primary is elected by comparing it with the hostname of demoted node. All of that happens in a for loop that retries replSetGetStatus until a new primary is elected and hostnames are different.
    @task(multiple_outputs=False)
    def step_down_primary(topology, **context):
        """
        Connects to the Primary node and executes rs.stepDown().
        Verifies that a new primary is elected and returns its hostname.
        """
        old_primary = topology['primary']
        mongo_uri = context['params'].get('mongo_uri', 'mongodb://root:percona@db-1:27017,db-2:27017,db-3:27017/?replicaSet=rs0')

        # We specifically want to connect to the TOPOLOGY (any node) to see the new state
        # Connecting to the old primary might result in connection checks failing or read-only mode,
        # but we need to find who the NEW primary is.
        client = pymongo.MongoClient(mongo_uri)

        print(f"Stepping down primary: {old_primary}")
        try:
            # We connect specifically to the old primary to command it to step down
            # In a real dynamic scenario, one might create a direct client to `primary_host`
            client.admin.command('replSetStepDown', 60, secondaryCatchUpPeriodSecs=10, force=True)
        except pymongo.errors.AutoReconnect:
            print("Successfully stepped down (connection closed as expected).")
        except Exception as e:
            print(f"Error executing stepDown: {e}")
            # It might have succeeded but threw an error due to connection loss
            pass

        # Wait for election and verify new primary
        print("Waiting for new primary to be elected...")
        for i in range(10):
            time.sleep(5)
            try:
                # We query the cluster status
                status = client.admin.command('replSetGetStatus')
                new_primary = None

                for member in status['members']:
                    if member['stateStr'] == 'PRIMARY':
                        new_primary = member['name'].split(':')[0]
                        break

                if new_primary:
                    if new_primary != old_primary:
                        print(f"New Primary elected: {new_primary}")
                        return new_primary
                    else:
                        print(f"Old primary {old_primary} is still primary. Waiting...")
                else:
                    print("No primary currently elected. Waiting...")

            except Exception as e:
                print(f"Error checking status: {e}")

        raise Exception("Failed to elect a new primary after stepDown!")
If seems logic that we can manually tackle the only node left and upgrade it using SSHOperator:
    # Upgrade the FORMER primary (which is now a secondary)
    upgrade_former_primary = SSHOperator(
        task_id='upgrade_former_primary',
        command=upgrade_commands,
        ssh_conn_id='ssh_default',
        remote_host=discovery['primary'], # dynamic reference to the result of discovery
        cmd_timeout=600
    )
Again we are simply running commands listed in upgrade_commands string variable.
If you don't know what MongoDB setFeatureCompatibilityVersion command does, we need to clear this out:
Think of the Feature Compatibility Version (FCV) as a "Safety Switch" for your database.
When you upgrade MongoDB packages, you replace codebases that modify your database differently.
Version 8.0 wiredTiger may change how data is saved on your datafiles, for instance.
When you change your cluster's FCV to 8, you allow MongoDB to use the new features you deployed.
Please keep in mind MongoDB official suggestion regarding checks before upgrading FCV:
Enabling backwards-incompatible features can complicate the downgrade process since you must remove any persisted backwards-incompatible features before you downgrade.
It is recommended that after upgrading, you allow your deployment to run without enabling backwards-incompatible features for a burn-in period to ensure the likelihood of downgrade is minimal. When you are confident that the likelihood of downgrade is minimal, enable these features.
Based on that, we usually let applications owners know if everything looks good on their end.
It could mean anything, but it usually means server and application driver logs are not throwing any error or warning logs.
For achieving the same behavior using Airflow we use PyhtonSensor to wait for a Variable Named mongodb_upgrade_proceed_fcv to equal yes .
    def check_approval(**context):
        if Variable.get("mongodb_upgrade_proceed_fcv", default_var="no") == "yes":
            return True
        return False

    wait_for_confirmation = PythonSensor(
        task_id='wait_for_fcv_confirmation',
        python_callable=check_approval,
        mode='reschedule',
        poke_interval=60,
        timeout=3600 # 1 hour timeout
    )
Task execution order is done using task dependencies operator:
https://airflow.apache.org/docs/apache-airflow/stable/core-concepts/dags.html#task-dependencies
We define ours steps ordering with the right bitshift operator:
discovery >> upgrade_secondaries >> step_down_task >> upgrade_former_primary >> wait_for_confirmation >> set_fcv_task
Are you ready to deploy in production?

The final scripts can be found here:
https://github.com/ad132p/labs/blob/main/dags/
Copy the script to your dags_folder defined under airflow.cfg configuration file.
Restart airflow and check DAGs available:
export AIRFLOW_HOME=/home/apollo/airflow
source .venv/bin/activate
airflow standalone
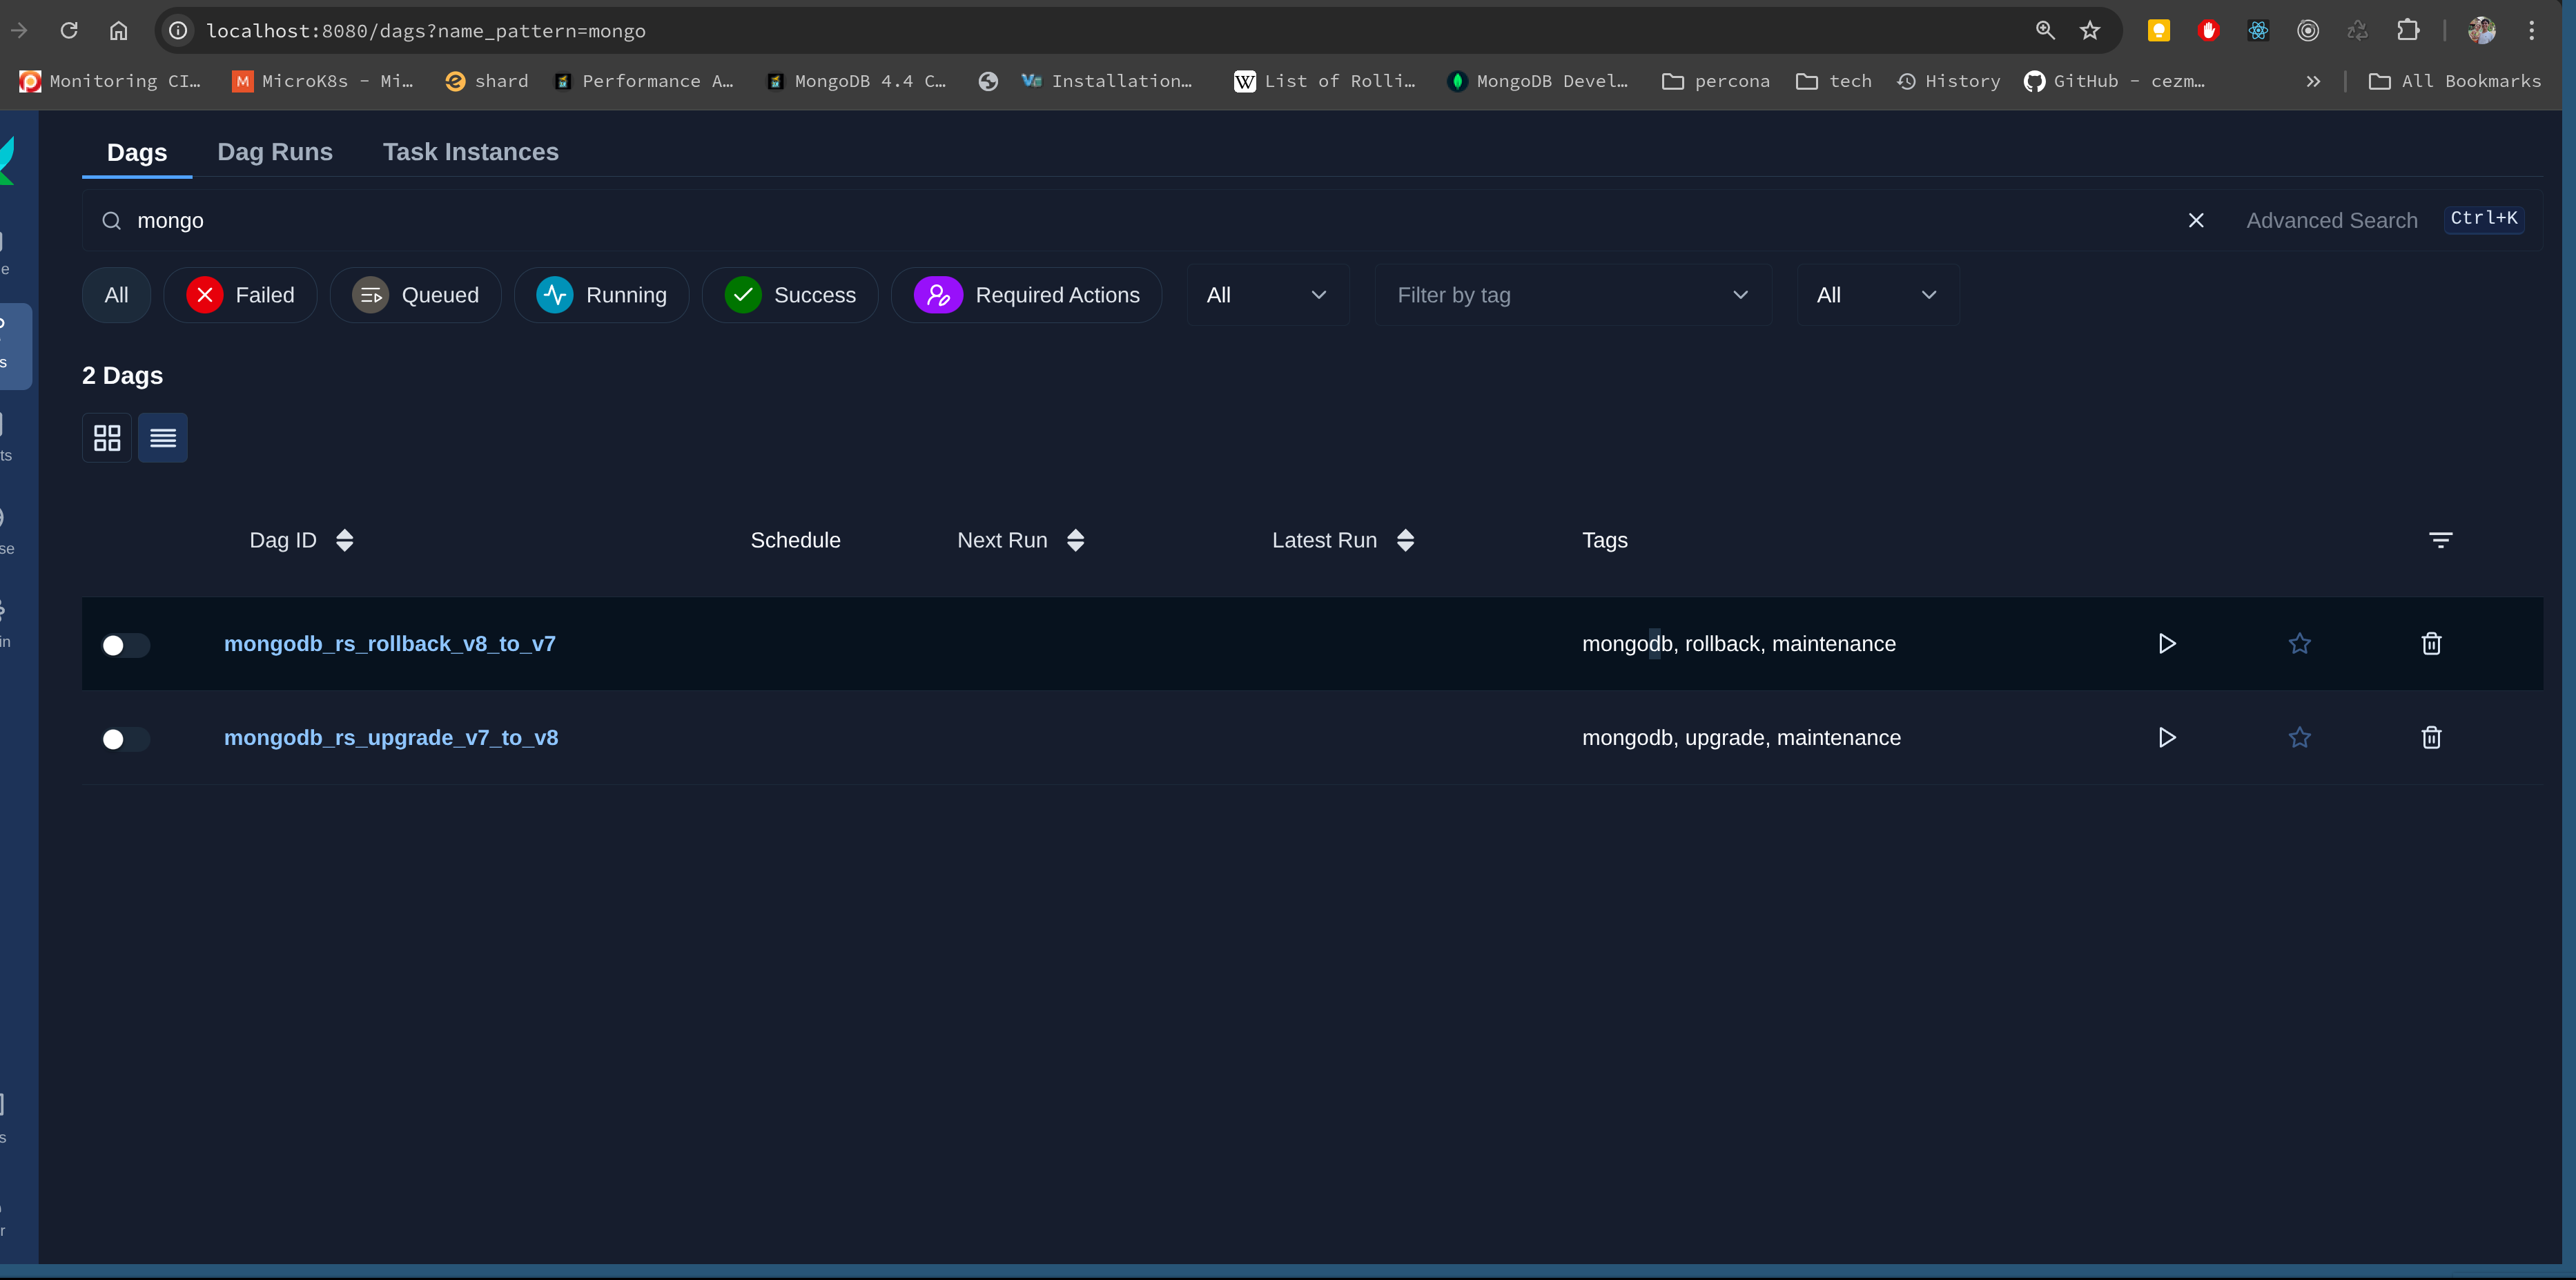
You should see 2 dags available:
mongodb_rs_upgrade_v7_to_v8 and mongodb_rs_rollback_v8_to_v7.
mongodb_rs_rollback_v8_to_v7 follows the same principles detailed in this implementation plan, except we downgrade packages and FCV. Feel free to test both DAGs interchangeably until you are comfortable to deploy in production.
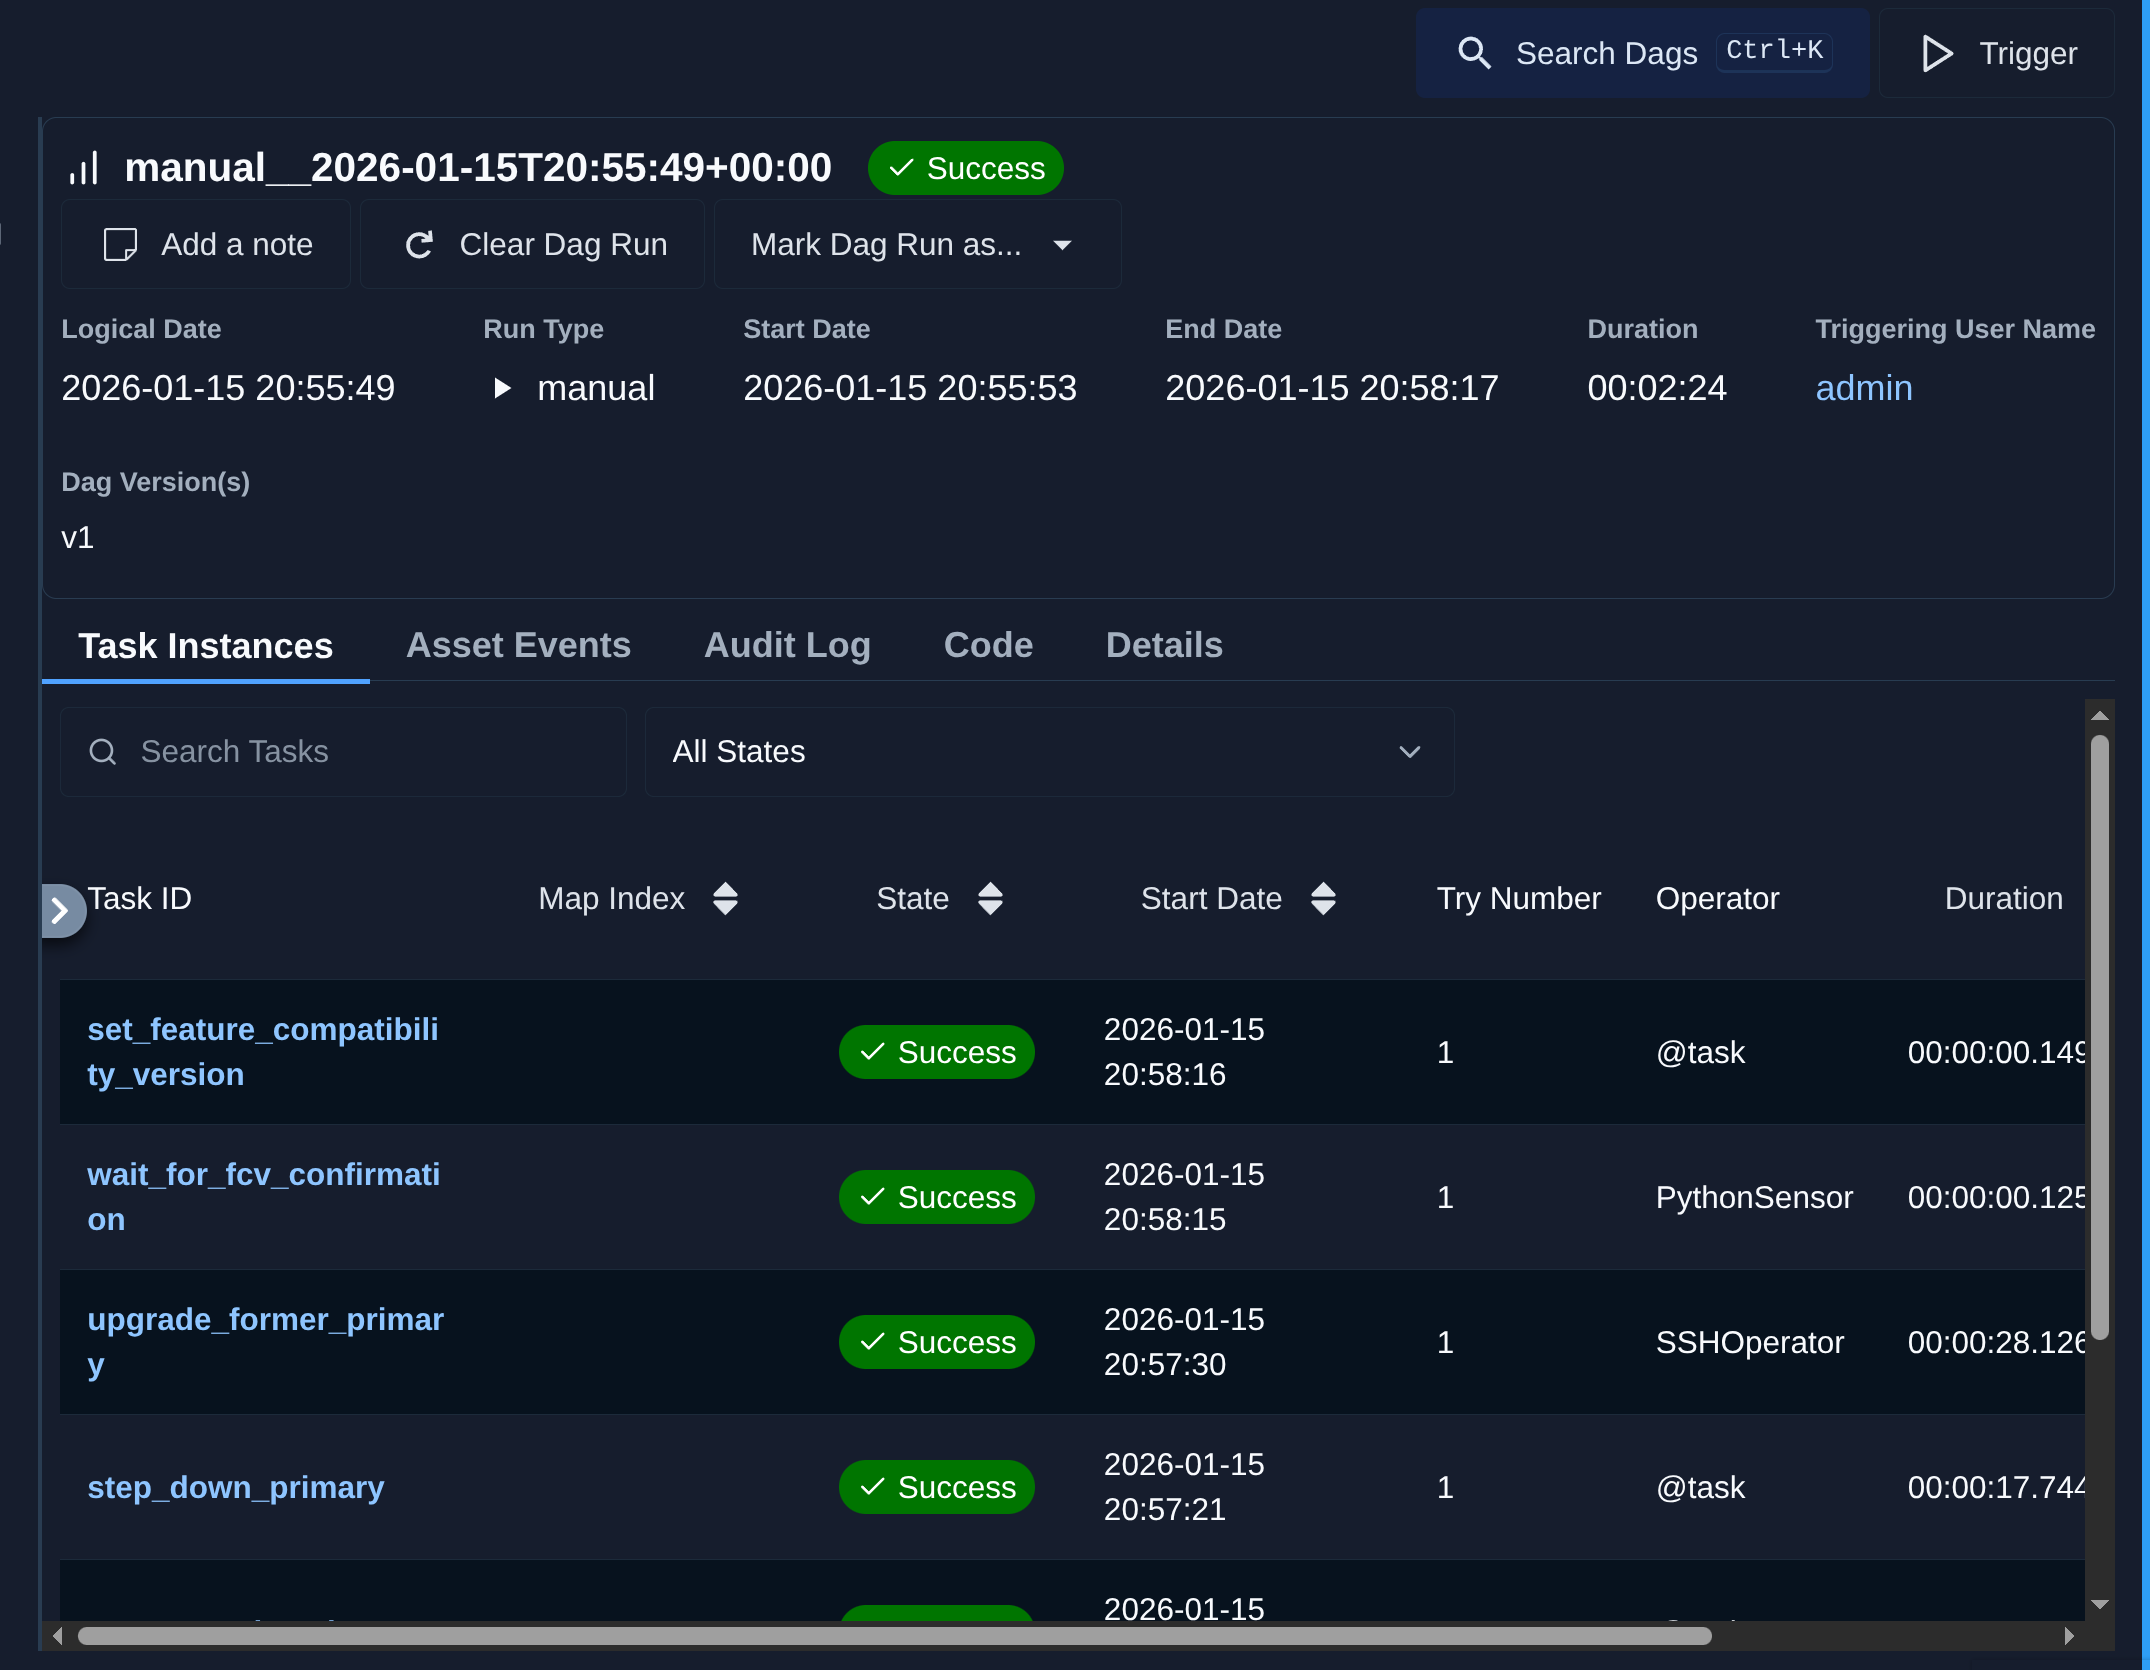
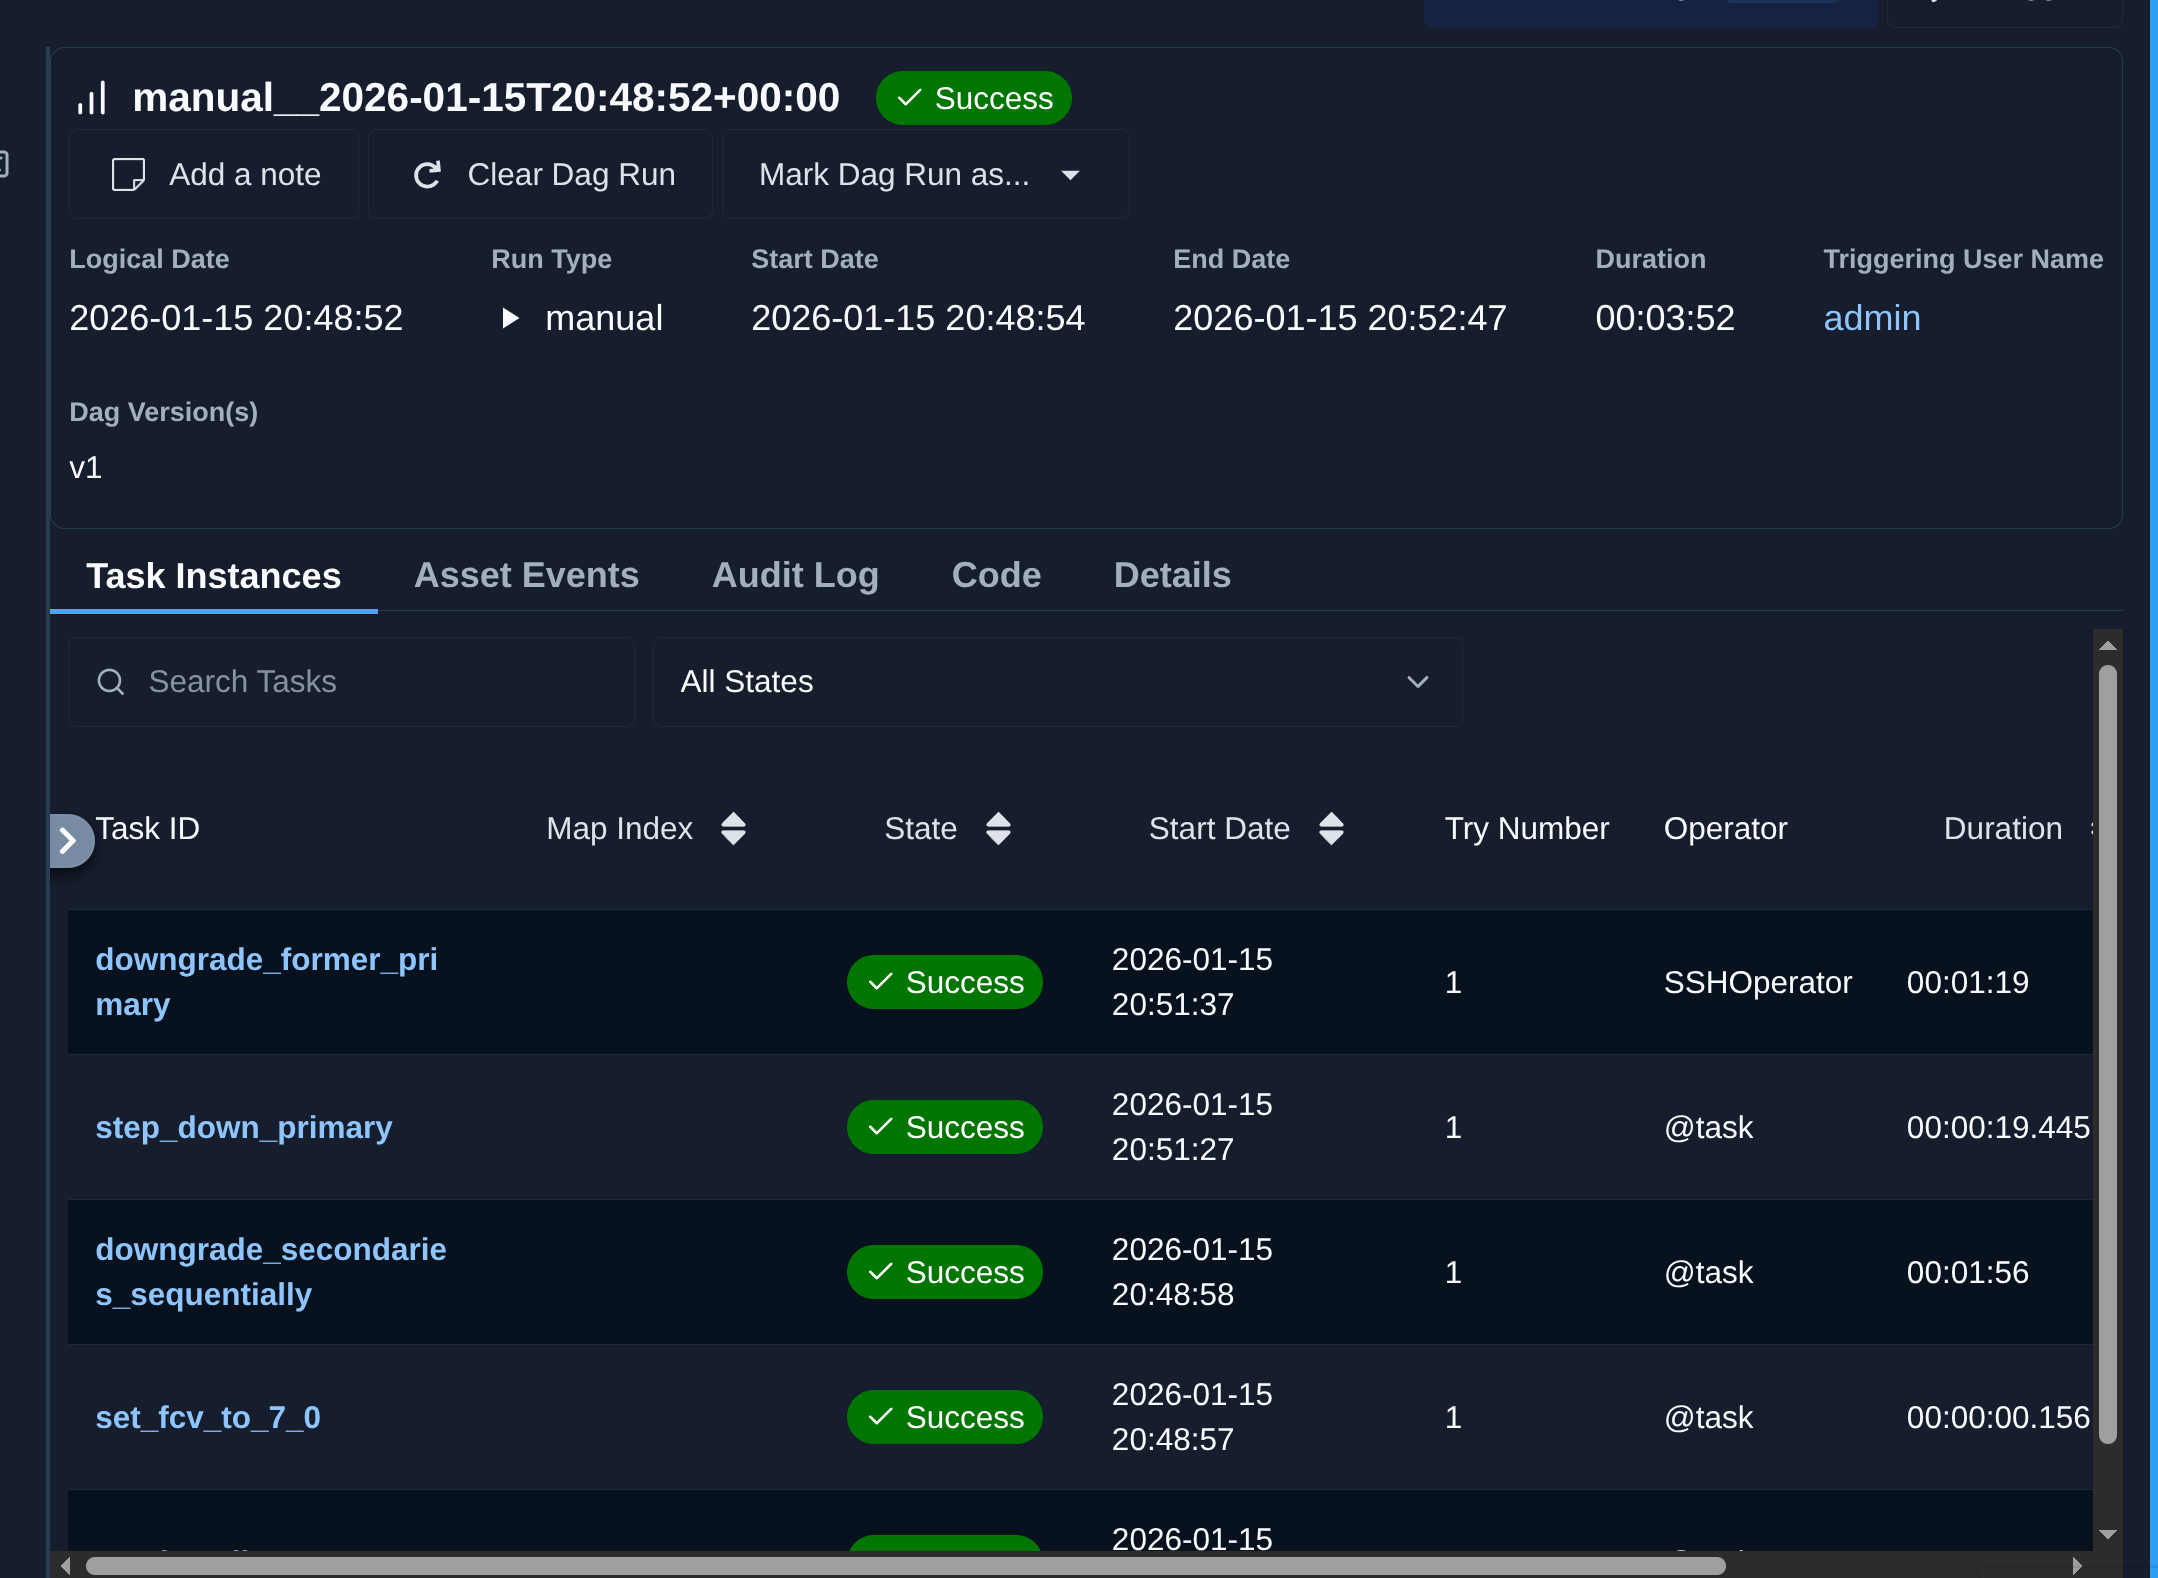
Let's take a look a how long the workflow take to complete:
Upgrade steps took around 3 minutes with mongodb_upgrade_proceed_fcv set to yes:
Rollback takes around 4 minutes to complete:
Many DBAs and Data engineers may use airflow for any sort of data workflow management, and considering the need for urgent upgrades derived from CVEs, data workers need to find better ways to quickly tailor playbooks/codebases to fulfill our customers varied environments.
Author: epaminondas
Tags: #databases #nosql #mongodb
Accessed 497 times.
Loading interactive comments...